はじめに
本稿では、DeepCogitoによって開発された新しい命令チューニング済み生成モデル「Cogito v1 preview」についてご紹介します。このモデルは、テキストを入力として受け取り、テキストを出力するタイプのLLM(大規模言語モデル)であり、商用利用可能なオープンライセンスで公開されています。技術的な側面を中心に解説していきます。
参照元情報:
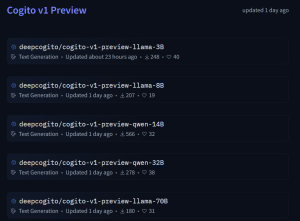
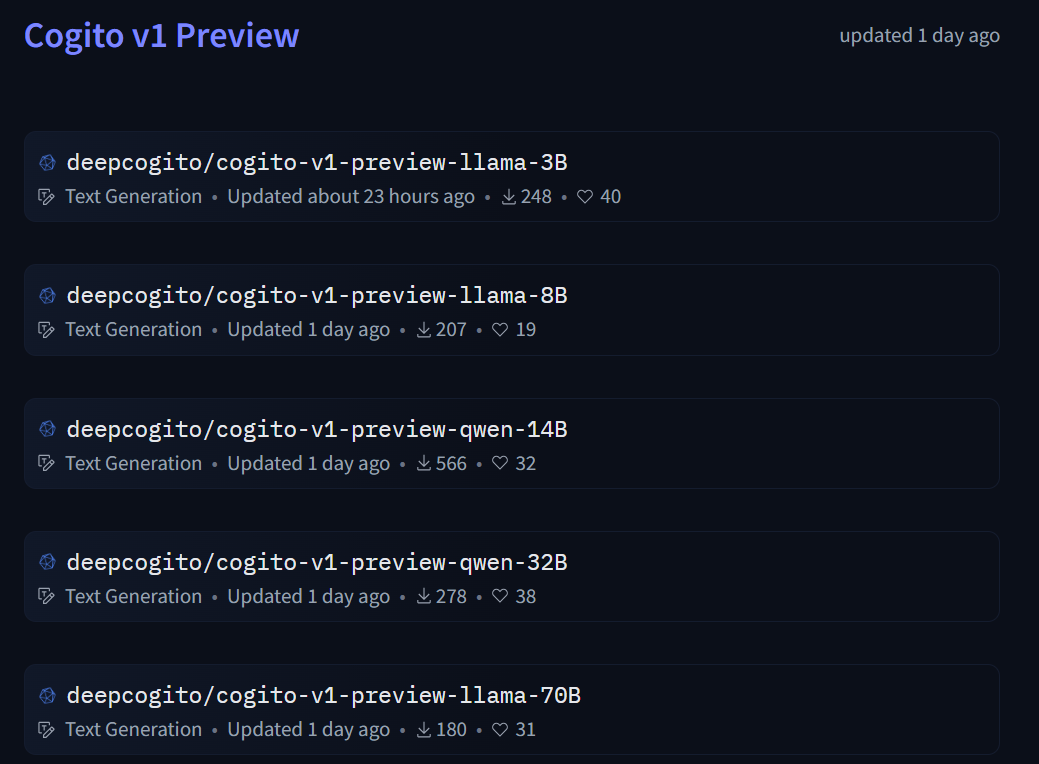
- タイトル: Cogito v1 preview – 3B (Hugging Face Model Card)
- 参照元URL: https://huggingface.co/deepcogito/cogito-v1-preview-llama-3B
要点
- ハイブリッド推論モデル: 直接応答(標準LLMモード)と、自己反省を経て応答(推論モード)の両方が可能。
- 高度な学習戦略: 超知能に向けたスケーラブルで効率的なアライメント戦略であるIDA (Iterated Distillation and Amplification) を用いて学習。
- 最適化された性能: コーディング、STEM(科学・技術・工学・数学)、命令追従、汎用的な対話能力に最適化。同等サイズのモデルと比較して、多言語能力、コーディング能力、ツール呼び出し能力が大幅に向上。
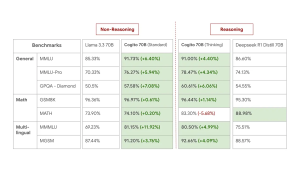
- 優れたベンチマーク結果: 標準モード、推論モードの両方で、同等サイズの最先端モデルを上回る性能を一般的な業界ベンチマークで示しています(詳細は元記事のブログポスト参照)。
- 多言語対応と長文脈: 30以上の言語で学習されており、128kトークンのコンテキスト長をサポート。
- オープンライセンス: Llama 3.2 Community License Agreementの下で公開されており、商用利用が可能。
※以下、本稿内容の記事をまとめたColabコード(実行確認済み:2025年4月9日) https://colab.research.google.com/drive/1fKKSPIIHFaLzJAIxiOWNN8w-BmQDq1gX?usp=sharing
詳細解説
Cogitoモデルの技術的特徴
Cogitoモデルは、単に指示に従うだけでなく、より複雑なタスクに対応するためにハイブリッド推論というアプローチを採用しています。これは、ユーザーの要求に応じて、即座に応答を生成する「標準モード」と、内部で思考プロセス(自己反省)を実行してから応答を生成する「拡張思考(Extended Thinking)モード」を切り替えられることを意味します。
学習にはIDA (Iterated Distillation and Amplification) という手法が用いられています。これは、モデルが自己改善を繰り返すことで、より高度な知能へとスケーラブルかつ効率的に到達することを目指す学習戦略です。この結果、Cogitoモデルは特にコーディングやSTEM分野、そして多言語環境やツール呼び出しといったタスクにおいて、既存の同規模モデルよりも優れた能力を発揮します。 30以上の言語に対応し、128kトークンという長いコンテキスト長を扱える点も、複雑なドキュメントの読解や長時間の対話が必要な場合に大きな利点となります。
※技術的な詳細を知りたい方は、以下を参照してください。
利用方法
Cogitoモデルは、Hugging Faceのtransformersライブラリを使って簡単に利用できます。以下、Hugging Face の内容を基に基本的な使い方と、拡張思考モード、ツール呼び出し機能の利用方法を示します。
1. 基本的な利用(標準モード)
まず、必要なライブラリをインポートし、モデルをロードして、利用します。
import transformers
import torch

# モデルIDを指定
model_id = "deepcogito/cogito-v1-preview-llama-3B"

# パイプラインを初期化
# torch_dtype=torch.bfloat16 は、利用可能な場合、メモリ効率と速度を向上させます
# device_map="auto" は、利用可能なGPUにモデルを自動的に配置します
pipeline = transformers.pipeline(
    "text-generation",
    model=model_id,
    model_kwargs={"torch_dtype": torch.bfloat16},
    device_map="auto",
)

# チャットメッセージをリスト形式で定義
# systemロールでモデルの振る舞いを指示できます
messages = [
    {"role": "system", "content": "You are a pirate chatbot who always responds in pirate speak!"}, # あなたは海賊風に話すチャットボットです!
    {"role": "user", "content": "Give me a short introduction to LLMs."}, # LLMについて簡単に紹介してください。
]

# パイプラインを実行してテキストを生成
outputs = pipeline(
    messages,
    max_new_tokens=512, # 生成する最大トークン数を指定
)

# 生成されたテキスト(最後の応答)を表示
# outputs[0]["generated_text"] にはシステムプロンプトを含む全対話履歴が入ることがあるため、
# 最後の要素 [-1] でユーザーへの最終応答を取得します。
# (ただし、pipelineの実装によっては調整が必要な場合があります)
print(outputs[0]["generated_text"][-1])
2. 拡張思考(Extended Thinking)モードの有効化
拡張思考モードを有効にするには、以下のいずれかの方法を用います。Cogito 3Bモデルで拡張思考を使用する際は、repetition_penalty=1.1 を設定することが推奨されています。
方法1: システムプロンプトに追加
システムプロンプトの先頭に Enable deep thinking subroutine. という指示を追加します。
import transformers
import torch

model_id = "deepcogito/cogito-v1-preview-llama-3B"
pipeline = transformers.pipeline(
    "text-generation",
    model=model_id,
    model_kwargs={"torch_dtype": torch.bfloat16},
    device_map="auto",
)

# 拡張思考を有効にするための指示
DEEP_THINKING_INSTRUCTION = "Enable deep thinking subroutine."

# 例1: 拡張思考指示のみをシステムプロンプトとする場合
messages_1 = [
    {"role": "system", "content": DEEP_THINKING_INSTRUCTION},
    {"role": "user", "content": "Write a bash script that takes a matrix represented as a string with format '[1,2],[3,4],[5,6]' and prints the transpose in the same format."}, # '[1,2],[3,4],[5,6]'形式の文字列で表現された行列を受け取り、転置行列を同じ形式で出力するbashスクリプトを書いてください。
]

outputs_1 = pipeline(
    messages_1,
    max_new_tokens=512,
    repetition_penalty=1.1 # 拡張思考モードで推奨される設定
)
print("--- Output with Method 1 (Simple) ---")
print(outputs_1[0]["generated_text"][-1])


# 例2: 既存のシステムプロンプトに追加する場合
system_prompt = "Reply to each prompt with only the actual code - no explanations." # 各プロンプトには実際のコードのみで応答し、説明は不要です。
prompt = "Write a bash script that takes a matrix represented as a string with format '[1,2],[3,4],[5,6]' and prints the transpose in the same format."

messages_2 = [
    {"role": "system", "content": DEEP_THINKING_INSTRUCTION + '\n\n' + system_prompt}, # 指示を既存プロンプトの前に結合
    {"role": "user", "content": prompt}
]

outputs_2 = pipeline(
    messages_2,
    max_new_tokens=512,
    repetition_penalty=1.1 # 拡張思考モードで推奨される設定
)
print("\n--- Output with Method 1 (Appended) ---")
print(outputs_2[0]["generated_text"][-1])
方法2: トークナイザで enable_thinking=True を設定
Hugging Faceのトークナイザを使用している場合、apply_chat_template メソッド実行時に enable_thinking=True 引数を追加します。
from transformers import AutoModelForCausalLM, AutoTokenizer
import torch

model_name = "deepcogito/cogito-v1-preview-llama-3B"

# モデルとトークナイザをロード
model = AutoModelForCausalLM.from_pretrained(
    model_name,
    torch_dtype=torch.bfloat16, # bfloat16を使用
    device_map="auto"
)
tokenizer = AutoTokenizer.from_pretrained(model_name)

prompt = "Give me a short introduction to LLMs."
messages = [
    {"role": "system", "content": "You are a pirate chatbot who always responds in pirate speak!"},
    {"role": "user", "content": prompt}
]

# チャットテンプレートを適用し、拡張思考を有効にする
# tokenize=False で文字列としてテンプレートを取得
# add_generation_prompt=True でモデルが応答を生成しやすい形式にする
text = tokenizer.apply_chat_template(
    messages,
    tokenize=False,
    add_generation_prompt=True,
    enable_thinking=True # ここで拡張思考を有効化
)
# テキストをトークン化してモデルに入力
model_inputs = tokenizer([text], return_tensors="pt").to(model.device)

# テキスト生成を実行
generated_ids = model.generate(
    **model_inputs,
    max_new_tokens=512,
    repetition_penalty=1.1 # 拡張思考モードで推奨される設定
)

# 入力部分を除いた生成部分のみを抽出
input_ids_len = model_inputs.input_ids.shape[1]
generated_ids = generated_ids[:, input_ids_len:]

# トークンIDをデコードして応答テキストを取得
response = tokenizer.batch_decode(generated_ids, skip_special_tokens=True)[0]
print("--- Output with Method 2 ---")
print(response)
3. ツール呼び出し(Tool Calling)
Cogitoモデルは、標準モードと拡張思考モードの両方でツールの呼び出し(単一、並列、複数、並列複数)をサポートします。これにより、外部APIや自作関数と連携させることが可能です。
from transformers import AutoModelForCausalLM, AutoTokenizer
import torch

# --- 前準備 (モデルとトークナイザのロードは上記と同様) ---
model_name = "deepcogito/cogito-v1-preview-llama-3B"
model = AutoModelForCausalLM.from_pretrained(
    model_name,
    torch_dtype=torch.bfloat16,
    device_map="auto"
)
tokenizer = AutoTokenizer.from_pretrained(model_name)

# 1. 呼び出したいツール(関数)を定義
def get_current_temperature(location: str) -> float:
    """
    指定された場所の現在の気温を取得します。

    Args:
        location: 気温を知りたい場所。"都市名, 国名" の形式で指定します。
    Returns:
        指定された場所の現在の気温(浮動小数点数)。
    """
    print(f"--- Tool 'get_current_temperature' called with location: {location} ---")
    # 本来はここで実際のAPI呼び出しや計算を行う
    # この例では固定値22.0を返す
    return 22.0

# 2. ユーザーからの質問を含むチャット履歴を作成
messages = [
  {"role": "user", "content": "Hey, what's the temperature in Paris right now?"} # ねえ、今のパリの気温は?
]

# 3. チャットテンプレートを適用(ツール情報も渡す)
#    tokenize=False で処理の流れを確認しやすくする
text = tokenizer.apply_chat_template(
    messages,
    tools=[get_current_temperature], # 利用可能なツールリストを渡す
    add_generation_prompt=True,
    tokenize=False
)
print("\n--- Input Text to Model (Requesting Tool Call) ---")
print(text)

# 4. モデルに入力し、応答を生成(ツール呼び出しを期待)
inputs = tokenizer(text, return_tensors="pt", add_special_tokens=False).to(model.device)
outputs = model.generate(**inputs, max_new_tokens=512) # repetition_penalty は不要な場合が多い

# 5. モデルの出力をデコード
output_text = tokenizer.batch_decode(outputs)[0]
# 入力部分を除去して、モデルが生成した部分のみを取得
# 注意: generateの出力には入力トークンも含まれるためスライスが必要
generated_part = output_text[len(text):]
print("\n--- Model Output (Tool Call) ---")
print(generated_part)

# --- ここからは、ツール呼び出し後の処理 ---
#   モデルがツール呼び出しを生成した場合 (<tool_call>...)

# 6. 生成されたツール呼び出し情報をパース(実際のアプリケーションではJSONパースなどが必要)
#    この例では、上記の期待される出力から手動で作成
tool_call_info = {"name": "get_current_temperature", "arguments": {"location": "Paris, France"}}

# 7. チャット履歴にアシスタントのツール呼び出しを追加
messages.append({"role": "assistant", "tool_calls": [{"type": "function", "function": tool_call_info}]})

# 8. 実際にツール(関数)を実行し、結果を取得
tool_result = get_current_temperature(**tool_call_info["arguments"])

# 9. チャット履歴にツールの実行結果を追加
messages.append({"role": "tool", "name": tool_call_info["name"], "content": str(tool_result)}) # 結果は文字列にする

# 10. 更新されたチャット履歴とツール情報を使って、再度モデルに応答生成を依頼
text_after_tool_call = tokenizer.apply_chat_template(
    messages,
    tools=[get_current_temperature],
    add_generation_prompt=True,
    tokenize=False
)
print("\n--- Input Text to Model (After Tool Call) ---")
print(text_after_tool_call)

inputs_after_tool_call = tokenizer(text_after_tool_call, return_tensors="pt", add_special_tokens=False).to(model.device)
outputs_after_tool_call = model.generate(**inputs_after_tool_call, max_new_tokens=512)

# 11. 最終的な応答をデコード
final_output_text = tokenizer.batch_decode(outputs_after_tool_call)[0]
final_generated_part = final_output_text[len(text_after_tool_call):]
print("\n--- Final Model Output (Using Tool Result) ---")
print(final_generated_part)

# 期待される最終応答の例: 'The current temperature in Paris is 22.0 degrees.<|eot_id|>'
※以下、本稿内容の記事をまとめたColabコード(実行確認済み:2025年4月9日) https://colab.research.google.com/drive/1fKKSPIIHFaLzJAIxiOWNN8w-BmQDq1gX?usp=sharing
ライセンス
本モデルおよびリポジトリは、Llama 3.2 Community License Agreement の下でライセンスされています。これは商用利用を含む比較的寛容なライセンスです。利用前にライセンスの全文を確認することをお勧めします。
まとめ
Cogito v1 preview は、ハイブリッド推論、IDAによる学習、多言語・長文脈対応、優れたツール呼び出し能力などを特徴とする、強力かつ柔軟なLLMです。特にコーディングやSTEM分野での活用が期待されます。オープンライセンスで公開されているため、研究開発から商用サービスまで、幅広い応用が可能です。本稿で紹介した利用方法を参考に、ぜひこの新しいモデルの可能性を探ってみてください。